What is Plane Table Surveying
Plane table surveying can be described in the following points;
- A plane table, a measuring tool, and a sighting device are used in the traditional surveying technique known as “plane table surveying” to take measurements and map the earth’s surface.
- The plane table is a flat surface that may be tilted and raised. A theodolite or compass is typically employed in plane table surveying to calculate the angles between survey locations. Locating and logging the survey points on the table requires using a sighting instrument, such as a telescope or alidade.
- A plane table survey involves setting up the table at a known location on the ground and orienting it to true north. The surveyor then uses the to sight the following point.
Definition of Plane Table Survey
Plane Tabling is a graphical surveying method in which fieldwork and plotting are done concurrently. It is most suitable for filling in the details between the stations previously fixed by triangulation or theodolite traversing. It is particularly adapted for small-scale or medium-scale mapping in which great accuracy is optional, as for topographical surveys.
Plane table surveying
Plane table surveying instruments
The plane table consists essentially of the following:
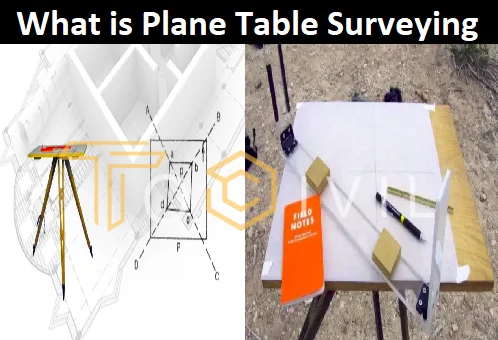
- A drawing board mounted on a Tripod.
- A straight edge is called an alidade.
The Drawing Board
The board is made of well-seasoned wood such as teak or pine and varies in size from 40 cm x 30 cm to 75 cm x 60 cm or 50 cm to 60 cm square. It is mounted on a tripod to be leveled, revolved about a vertical axis, and clamped in any position. The board has a leveling head or a ball and socket arrangement.
The Alidade
The alidade consists of a metal (brass or gunmetal), boxwood straight edge, or ruler about 50 cm long. The fiducial edge is the alidade’s beveled (ruling or working) edge. The alidade may be plain or telescopic, as it is fitted with sight vanes at both ends or with a telescope. One sight vane is provided with a narrow slit, and the other with a central vertical wire or hair. In both cases, the line of sight is in the same vertical plane as the fiducial edge or parallel to it.

Plane Table Accessories
The accessories to the plane table are:
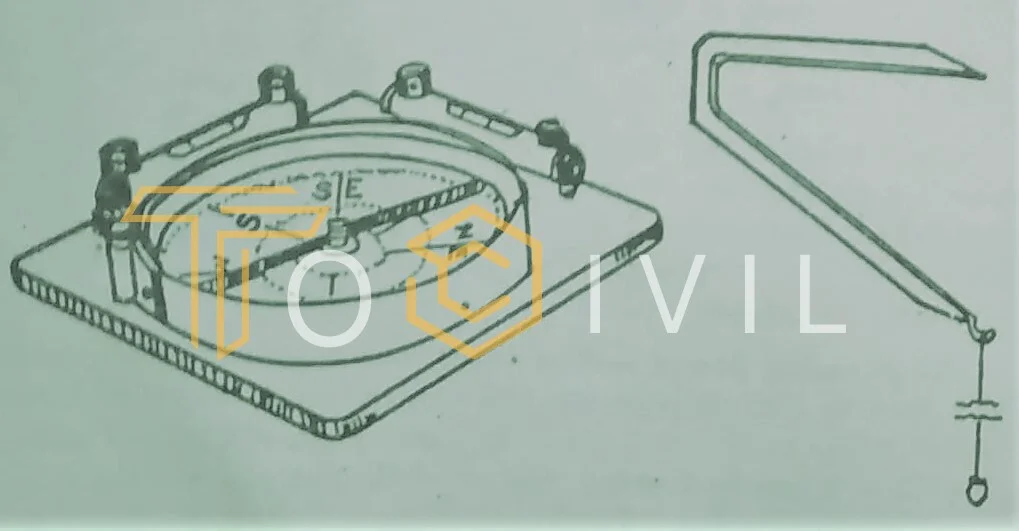
- A trough compass or a circular box compass with two bubble tubes at right angles to each other mounted on a square brass plate for marking the direction of the magnetic meridian on paper.
- A plumbing fork or U frame with a plumb bob centering the table.
- A waterproof cover to protect the sheet from rain.

Important Points of Plane Table Surveying
The following points should be borne in mind while surveying the plane table.
- The small letters a, b, and c denote the points plotted on the sheet to represent the corresponding points A, B., C, etc., on the ground.
- The table remains clamped while the objects are sighted. The alidade is moved on the table to bisect the things.
- While the sights are being taken, the alidade must be centered or pivoted on (i. e. the fiducial edge of the alidade must be set to) the plotted station point on the sheet.
- The board is turned only when the table is to be oriented. After adequately training the table, the board must be clamped into the position
Setting up the Plane Table
The following operation should be performed to set up the table at a station.
- The table should be set up at a convenient height for working, about 1 m and approximately level. The legs of the tripod should be spread well apart and firmly fixed into the ground.
- The table should be placed over the station on the ground and the point plotted on the sheet corresponding to the station occupied should be precisely over the station on the floor. This operation is known as the centering of the table. This may be done using a plumbing fork or U frame. To do this, place the pointed end of the upper leg of the division coinciding with the point on the paper and suspend a plumb line from the other leg.
- Shift the table bodily until the plumb bob hangs precisely over the center of the station peg. If no plumb bob is available, centering of the table may be done by dropping a stone from a point on the underside of the board directly under the moment on the paper. The degree of accuracy required in centering depends upon the map’s scale. Accurate centering is necessary only in large-scale work. When the scale is small, it may be approximate as the error even of 30 cm would not show on the map.
- The table is then leveled using the leveling screws concerning a level tube or circular level placed on the table first parallel to two screws and then over the third screw, the process of leveling being expedited with the pair of cross levels; or by tilting the board by hand if the table is provided with a ball and socket head, or by adjusting the legs only if no leveling head or a ball and socket arrangement is fitted.
Orienting the Table
Keeping the table at each of the successive stations parallel to the position it occupied at the first station is known as orientation. It is necessary when the instrument has to be set up at more than one station. When the table is oriented correctly, the lines on the paper are parallel to the lines on the ground, which they represent. If it is not taught, a different meridian will be used at each of the successive stations, which is anomalous.
There are two methods of orienting the table:
- By the use of the magnetic needle.
- By backsighting. Orientation may also be affected by solving the two-point problem and three-point problem
Orientation by the Magnetic Needle
To orient the table at any subsequent station, the trough compass (or circular box compass is placed along the line representing the magnetic meridian which has been drawn on the paper at the first station, and the board is then turned until the ends of the needle are opposite the zeros of the scale. The board is then clamped in position. This method is sufficiently accurate, provided there is no local attraction. It is suitable for rough small-scale mapping.
Orientation by Backsighting
This is the most accurate orientation method and is always preferred. Suppose the table is set up over station Q on the line PQ, which was previously drawn as pq from station P. The alidade is placed along the line qp. The board is then turned until the line of sight bisects the running rod at P.
The board is then properly oriented and clamped in this position. Care should be taken to place the table at each of the successive stations so that the centering of the table is least altered when the table is turned in azimuth for orientation. To ensure this, the line (ap joining the station (q) and the preceding one (p) plotted on the paper should be as nearly parallel as possible to the corresponding line QP on the ground.
Advantages of Plane Table Surveying
- It is most suitable for preparing small-scale maps.
- It is the most rapid.
- The field book is unnecessary as plotting is done in the field concurrently with the fieldwork; hence, the mistakes in booking the field notes are avoided.
- The surveyor can compare the plotted work with the basic features of the area surveyed and thus can ascertain if it represents them properly. And cannot, therefore, overlook any essential elements.
- There is no possibility of omitting the necessary measurements as the map is plotted in the field. Check lines may readily detect
- Errors of measurement and plotting.
- Contours and irregular objects may be represented accurately since the tract is in view.
- It is particularly advantageous in magnetic areas where a compass survey could be more reliable.
- It is less costly than a theodolite survey.
- No great skill is required to prepare a good map.
Disadvantages of Plane Table Surveying.
- The plane table is essentially a tropical instrument.
- It is not suitable for work in a wet climate.
- It is heavy, cumbersome, and awkward to carry.
- There are several accessories to be carried, and, therefore, they are likely to be lost.
- It is not intended for real work.
- If the survey is to be replotted to a different scale or quantities are to be computed, it is a great inconvenience in the absence of the field notes
More Articles
FAQ’s
How many types of distance are there in plane surveying?
There are three different distance measurements used in plane surveys:
1. Horizontal distance
2. Vertical distance:
3. Slope distance
Horizontal distance: The distance between two places on the horizontal plane is called the “horizontal distance.”
Vertical distance: This is the separation between two points measured vertically. A leveling tool, such as a level or a theodolite, is used to measure it.
Slope distance: This is the separation between two places along the slope.
What is the difference between plane tables and geodetic surveying?
Geodetic surveying is used for large-scale mapping, long-distance measurement, and precision surveying, whereas plane table surveying suits small-scale and topographical surveys. In geodetic surveying, higher levels of precision are attained by using complex equipment and procedures.
Which method of plane table survey is most accurate?
The traverse or intersection methods and the radiation or polar survey method are thought to be the least accurate because they tend to accumulate errors more slowly. Executing this method correctly, though, requires a high level of expertise and experience, so it might not be appropriate in all surveying circumstances.
What are the sizes of plane table?
Plane tables are available in different sizes, depending on the specific application and the preference of the surveyor. The most common sizes of plane tables are:
Small: which is around 30cm x 30cm(12inch x 12inch)
medium: which is around 60cm x 60cm(24inch x 24inch)
Large: which is around 120cm x 120cm(48inch x 48inch)
What are objects of plane surveying?
In plane surveying, the objects or subjects of study are usually the physical features of the earth’s surface and their relative positions. Some common objects of plane surveying include:
1. Boundaries, 2. Topography, 3. Engineering design, 4. Construction, 5. Mapping, 6. Geodetic control
